Posts

Microsoft Word: Automatically insert file name
Image
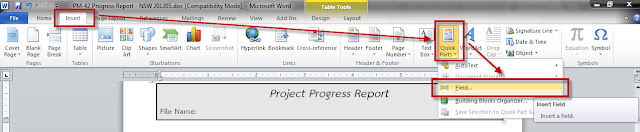
You may want to add file name into the document in case of printing out. You can add in Header, Footer or any other area. Here are the steps: Environment : Microsoft Word 2010 Put the cursor in the place that you want to insert file name. From the menu bar, select "Insert", click at "Quick Parts" button and select "Field...". In pop-up window: In "Categories:", select "Document Information". "Field names:", select "FileName". Click "OK" button to save. The file name will be automatically shown the below. Credited to:  http://www.itpro.co.uk/blogs-archive/arronj/2007/08/22/word-2007-inserting-automatic-file-name-and-path/
Microsoft Word: Split the connected table

Image
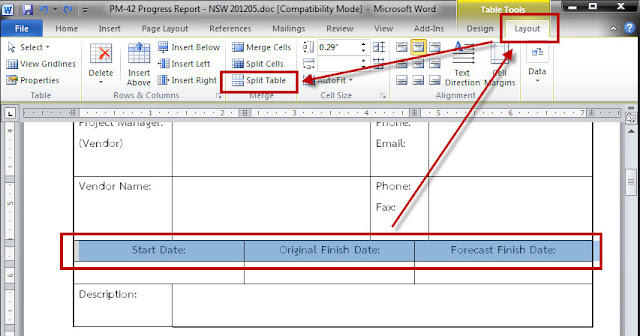
You may create a table and want to split it. But sometimes, you delete the line between tables and Microsoft Word join those tables together. So, how can you split it again? Suppose that you can't undo your action. Environment : Microsoft Word 10 Select the row that you want to split from the table above. From the menu bar, select "Layout" and then "Split Table". The result will be shown as below.

Microsoft Project: How to wrap text

Image
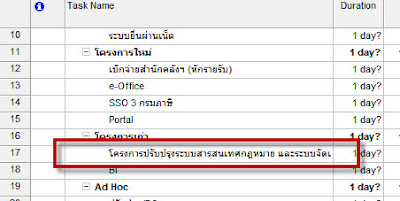
You might find the problem about the long task in Microsoft Project. What you normally do is to extend the length of the column. But then, it bothers the graphical area and trouble about printing size. The other way to handle this is to wrap text. Microsoft Project doesn't provide an easy text format property for you to wrap text as in Excel. Here is the step to wrap text. Environment : Microsoft Office Project 2007 Move the mouse to the left most column and drag under the line that you want to wrap text until there is enough space. The text will be wrapped automatically. If you want to do many rows at once, you can select other row by holding Control key as well. Reference:  http://office.microsoft.com/en-us/project-help/change-row-height-and-wrap-text-HP001037926.aspx

Microsoft Project: Change task bar to 2-D

Image
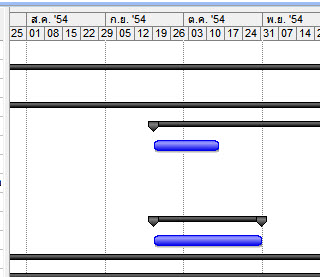
To be more classic, I feel like task bar showing as 2-D more than 3-D. The 3-D is showing like this. Here are the steps to change it. Environment : Microsoft Office Project 2007 From menu bar, select "Tools" and then "Options...". In "Options" pop-up window Select "View" tab. Uncheck "Bars and shapes in Gantt views in 3-D" under "Show" section. Click "OK" to accept the change. The result will be shown as below.

Microsoft Project: Set new task starting from current date

Image
Once you create long-term schedule in Microsoft Project and you want to add new task later on, it will create the new task and put default date in the project starting date. It's not so convenient to look for it or to change the date. So, you can just set the parameter for the default. Environment : Microsoft Office Project 2007 - Select "Tools" from the menu bar and then select "Options...". - In "Options" pop-up window    - select "Schedule" tab.    - Select "New tasks" under "Scheduling options for "    - Then select "Start on Current Date".    - Click "OK" button to save the setting.

Microsoft Project: How to change text format in 'Duration'

Image
To change the text format in the 'Duration' column in Microsoft Project, it help for the columns display space. Environment : Microsoft Office Project 2007 Please follow these steps: - Select "Tools" from menu bar and then "Options...". - There will be "Options" pop-up window. Select "Edit" tab and select "Days:" dropbox. Select the format that you want to change to and click "OK". The result will be changed as below.

Nokia: Set proxy for S60

First, you must connect and put the password to connect the wireless that you want to set. You must not connect the wireless that you want to set. Then, follow these steps. - Select "Menu". - Select "Tools". - Select "Settings". - Select "Connection". - Select "Access points". - Move the highlight to the wireless that you want to set proxy and select "Options" and then select "Edit". - Select "Options" and select "Advanced settings". - Select "Proxy server address" and enter the IP address. Then, select "OK". - Select "Proxy port number" and enter port number. - Select "Options" and then, "Exit". Try to connect the wireless that you just set. Reference:  http://discussions.europe.nokia.com/t5/Connectivity/How-to-set-up-proxy-on-Symbian-S60-3rd-edition/td-p/324242